
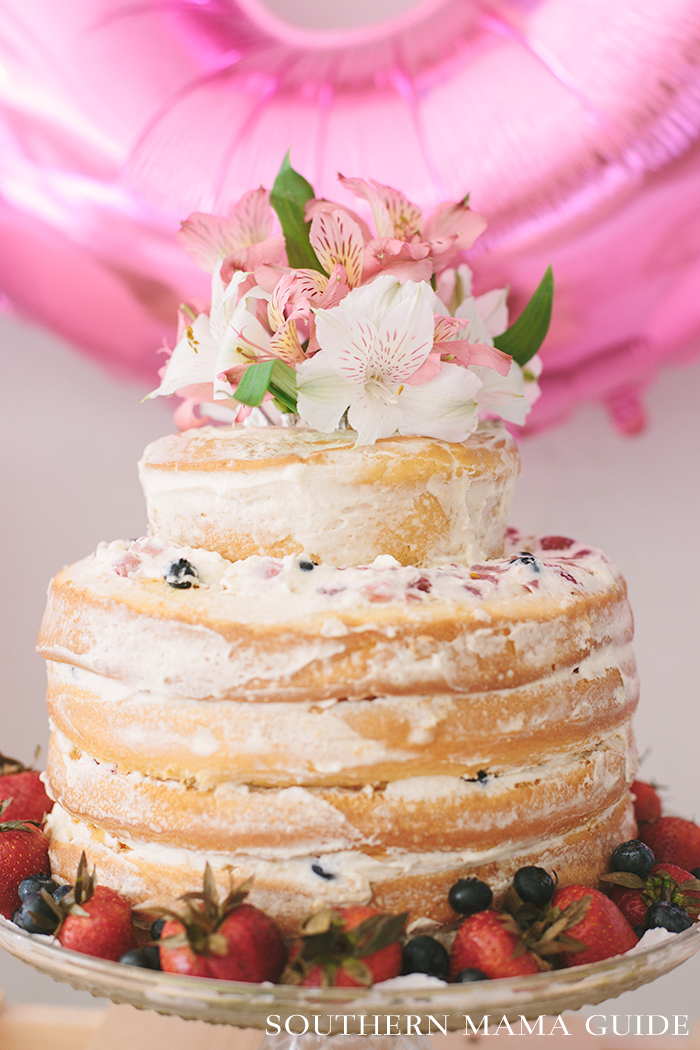
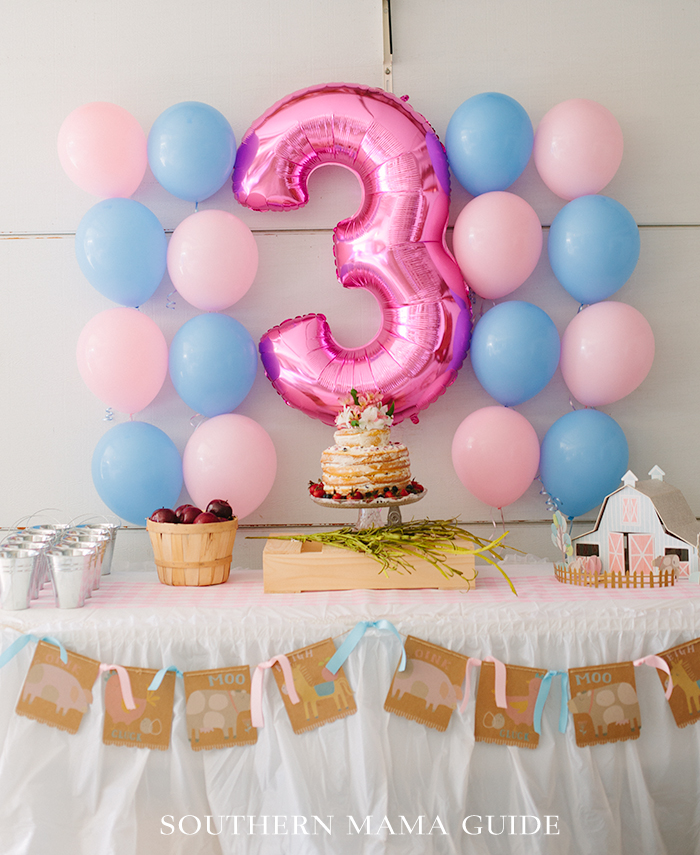
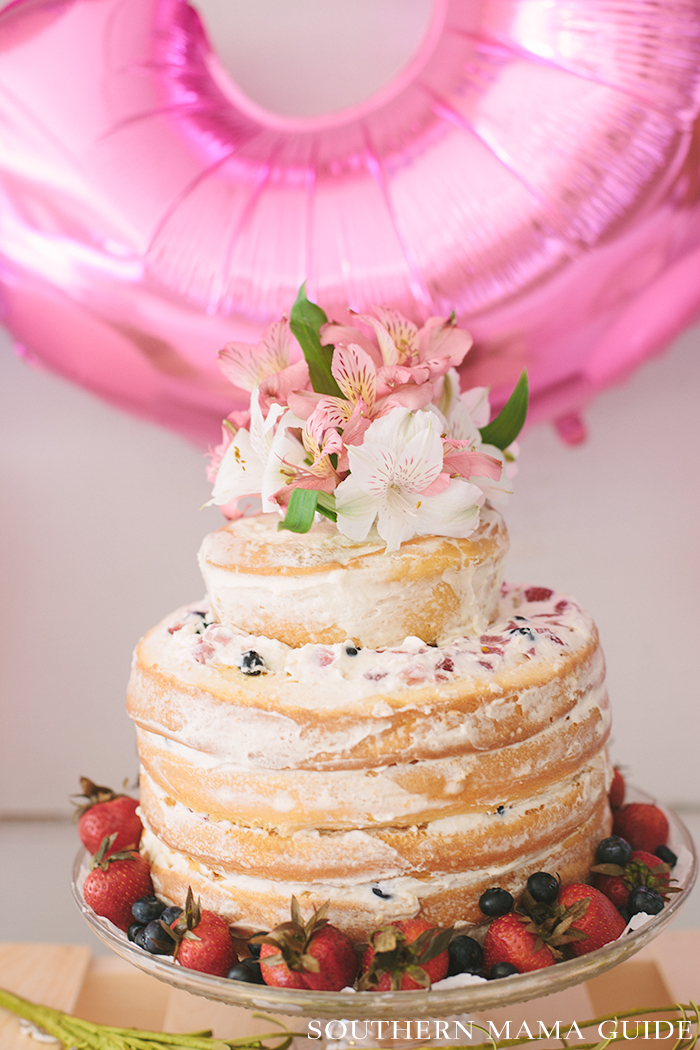
Last month we celebrated my daughters third birthday back in our hometown of Louisiana! It was a barnyard bash theme and was just the cutest party ever. See her party here! I wanted to skip the fondant cakes and do something homemade that represented more of a homey/market feel of a cake. I had been eying quite a few cakes on pinterest and just combined my ideas into making this one. I am so pleased with how it came out! Since posting her birthday party on here and on my personal instagram, I’ve gotten so many requests for this recipe! I finally had a free minute so I wanted to type up the directions and recipe on how we made the cake!
For this recipe, we purchased a box of yellow cake mix from whole foods to keep it somewhat simple since we knew the decorating part would be tedious. My mother in law did all the baking and cooked a total of 6 layers of cake. The day before her party we started the prepping. To make a layered cake like this you will need 2-3 round pans and a sharp ‘bread‘ sort of knife (any knife will work, really). After you have cooked the cakes, remove them from the pan and begin shaving off the top curved layer to make it completely flat. This will help the cake stay at bay if you plan to do a lot of layers. I didn’t have to shave from corner to corner, just right where the cake started rising. It doesn’t have to be perfect, you won’t see these top layers once you start stacking. I layered each cake individually and stacked one by one rather than shaving each one first. After you have one layer shaved, take your chantilly frosting and put a thick layer of it on the top of the cake. Smooth it out. Then you can add your sliced up fruit (we used strawberries and blueberries only) on top of the icing. Smooth it out with your spatula and add another cake layer. Repeat until you are done with your layers. Once done, I took a baking spatula and started to put some icing on the outside to give it that ‘glazed’ look. I added some wildflowers to the top (wrapped the stems in foil first) and then used leftover strawberries and blueberries to decorate the bottom with. This cake was SUCH A HIT! So many party guests came up to us saying how delicious it was, so that made us so happy since a lot of effort went into making it. All the cake was gone by the end of the party so that definitely says something 🙂 Below are the details for the frosting, and we just used a box cake mix from whole foods for the yellow cake! It was really not that difficult to do and I definitely will be making more in the near future!
Here is the chantilly frosting recipe I found and used via a sue chef.
Chantilly Frosting
(recipe can be halved)
1 stick unsalted butter, room temp
16 oz mascarpone cheese, room temp
8 oz. cream cheese, room temp
2½ – 3 cups confectioner’s sugar
⅛ tsp. salt
1 cup heavy whipping cream (1 half pint)
1 tsp. almond extract, optional
Directions for Frosting
1. First, cream the butter, cream cheese, and mascarpone. After it is light and fluffy, add the salt and confectioners sugar and mix to combine.
2. In a different bowl, stir together the heavy whipping cream until it stiffens a bit. Do not to over mix because it will become grainy and the texture will change the appearance of the frosting.
3. Gently fold the whipped cream into the mascarpone cream cheese mixture until fully mixed.
If you are not using the icing immediately, cover and refrigerate and take out 10 minutes to bring to room temperature before applying to the cake.


This looks incredible! I can’t wait to try it!!
Oh my goodness I want to eat that (all of it) right now!
This cake was so beautiful, girlfriend! I bet it was delicious, too. 🙂 And I adored S’s party theme. So cute and right up my alley. Might have to do that next year.
Hi there!! I’ve made this cake once before for my daughters birthday and everyone absolutely loved it!!! I want to make it again, but unfortunately the asuechef site is no longer up!! ?? would you happen to have this recipe down somewhere? Please and thank you!
oh no! let me do some research and i’ll see if i can find it. i wrote out most of the directions that i remembered in the post though 🙁